DEATHNOTE: 1 VulnHub CTF
In this blog, we will solve a capture-the-flag challenge ported on the
Vulnhub platform by an author named HWKDS. As per the
description, this is a beginner-friendly challenge as the difficulty level is
given as easy. As a hint, it is mentioned that this is a straightforward box,
and we need to follow the hints while solving this CTF. Prerequisites would be
knowledge of Linux commands and the ability to run some basic pen-testing
tools.
For those who are not aware of the site, VulnHub is a well-known website for security researchers that aims to provide users with a way to learn and practice their hacking skills through a series of challenges in a safe and legal environment.
The steps
- Getting
the IP address with the Netdiscover utility
- Identify
open ports through Nmap
- Enumerating
HTTP service
- Critical
File Found
- Running
brute force through Hydra
- Escalating privileges to get the root access
Step 1.
The first step is to run the Netdiscover command
to identify the target machine’s IP address. In the screenshot given below, we
can see that we have run Netdiscover, which gives us the list of all the
available IP addresses. It can be seen in the following screenshot.
Command :- [ netdiscover ]
In the highlighted area of the above screenshot, we can see an
IP address, our target machine IP address. The target machine IP address
is 192.168.51.89, and I will be using 192.168.51.10 as
the attacker’s IP address.
Note: the target machine IP address may be different in your
case, as the network DHCP is assigning it.
Step 2.
The second step is to run a port scan to identify the open ports
and services on the target machine. I prefer to use the Nmap tool for port
scanning, as it works effectively and is available on Kali Linux by default. In
the highlighted area of the following screenshot, we can see the Nmap command
we used to scan the ports on our target machine. The identified open ports can
also be seen in the screenshot given below:
Command :- [ nmap -sV -sC 192.168.51.89 ]
In the Nmap Command, we used ‘-sV’ option for version
enumeration and -sC is using for perform a default script.
The output of the Nmap shows that two open ports have been identified
Open in the full port scan. Port 80 is being used for the HTTP service, and
port 22 is being used for the SSH service. So, in the next step, we will start
solving the CTF with Port 80.
Step 3.
Let us start the CTF by exploring the HTTP port. We opened
the target machine IP address on the browser.
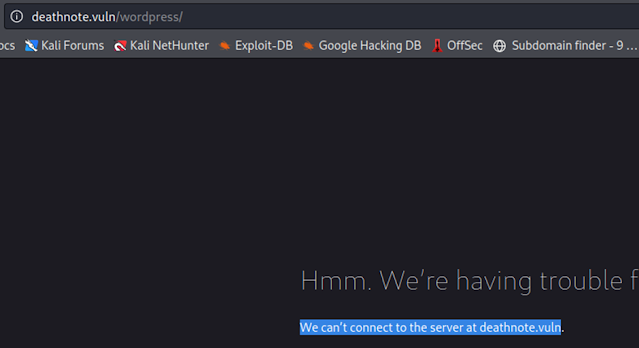
we need to add the given host into our, etc/hosts file to run
the website into the browser.
Command :- [ echo 192.168.1.60 deathnote.vuln >> /etc/hosts ]
In the above screenshot, we can see that we used the echo
command to append the host into the ‘etc/hosts’ file. The same was verified
using the cat command, and the command’s output shows that the mentioned host
has been added. So, let us open the URL into the browser, which can be seen
below.
The target application can be seen in the above screenshot. On
the home page, there is a ‘hint’ option available. So, we clicked on the ‘hint’
and found the below message.
The comment left by a user names’ L’ contains some hidden
message which is given below for your reference –
my fav line is imjustice3
We do not understand the hint message. This could be a username
on the target machine or a password string.
Step 4.
It means whenever any web server or a web application having
file that contains some kind of sensitive information and can be use for
further attacks. It includes files having database passwords, web server
authentication data, critical business logic information etc.
This is also one of the most common issue that is found on
the websites. For finding this vulnerability I have made a file which contains
5000+ critical files that could be found on the websites.
Go to url and download this file .
Now hit enter and
capture the request using burp suite
Send
the request to intruder and click on clear
Now
select the “wordpress/”and click on add
Now go to
payload section and select the option load and add the payload file
Click on
start attack and check for the Status - 200 which means file has been found , Now
check the file.
In the above screenshot, we can see the ‘robots.txt’ and wp-login.php
file on the target machine. The file was also mentioned in the hint message on
the target machine. So, let us open the file on the browser to read the
contents.
So go to
burp repeater and edit get request then send
we collected useful information from all the hint messages
given on the target application to login into the admin panel.
- Password: iamjustic3
- Username: kira
After a few attempts, the username ‘Kira worked on the login page, and
the password was also easily guessed from the hint messages we had read
earlier. We have WordPress admin access, so let us explore the features to find
any vulnerable use case.
While exploring the admin dashboard, we identified a
‘notes.txt’ file uploaded in the media library. Let us open the file on the
browser to check the contents.
The notes.txt file seems to be some password wordlist. Let us
use this wordlist to brute force into the target machine.
Command :- [ ls user pass -l ]
We created two files on our attacker machine. We added all the
passwords in the ‘pass’ file. We have enumerated two usernames on the target
machine, ‘l’ and ‘kira.’ We have added these in the ‘user’ file. In the next
step, we will be running Hydra for brute force.
Step 5.
Hydra is one of the best tools available in Kali Linux to run
brute force on different protocols and ports. Here we will be running the brute
force on the SSH port that can be seen in the following screenshot.
Command :- [ hydra -L user -P pass 192.168.1.16 ssh ]
The hydra scan took some time to brute force both the usernames
against the provided word list. After some time, the tool identified the
correct password for one user. The identified username and password are given
below for reference:
Username- l
Password- death4me
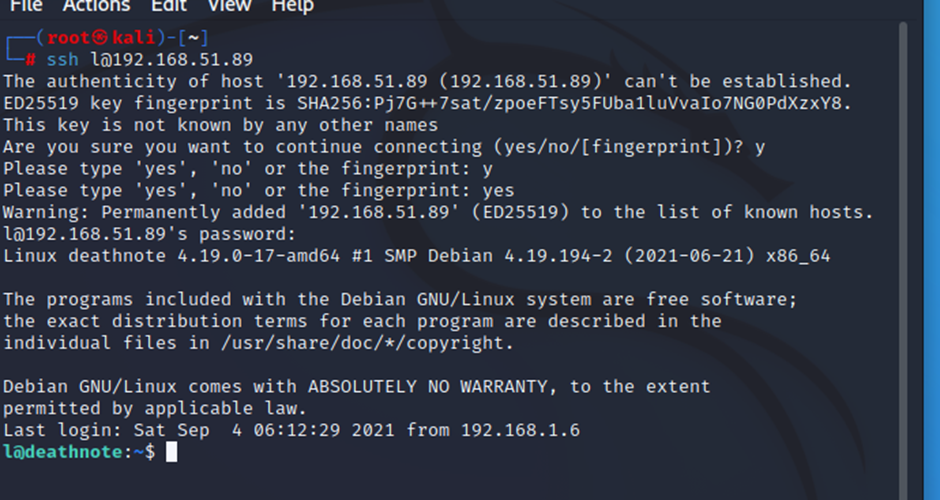
Let us try the details to login into the target machine through
SSH.
Command :- [ ssh l@192.168.1.16 ]
Username: l
Password: death4me
The login was successful as the credentials were correct for the
SSH login. We are now logged into the target machine as user ‘l.’ We ran the id
command output shows that we are not the root user. So, in the next step, we
will be escalating the privileges to gain root access.
Step 6.
After logging into the target machine, we started information
gathering about the installed operating system and kernels, which can be seen
below.
After getting the version information of the installed operating
system and kernel, we searched the web for an available exploit, but none could
be found. So, we used the ‘sudo –l’ command to check the sudo permissions for
the current user. As seen in the output above, the command could not be run as
user ‘l’ does not have sudo permissions on the target machine.
So, we continued exploring the target machine by checking
various files and folders for some hint or loophole in the system. Soon we
found some useful information in one of the directories.
Command :- [ cat /opt/L/fake-notebook-rule/case.wav ]
In the ‘/opt/’ folder, we found a file named ‘case-file.txt’
that mentions another folder with some useful information. We opened the
‘case.wav’ file in the folder and found the below alphanumeric string.
63 47 46 7a 63 33 64 6b 49 44 6f 67 61 32 6c 79 59 57 6c 7a 5a
58 5a 70 62 43 41 3d
This seems to be encrypted. Let us try to decrypt the string by
using an online decryption tool.
In the above screenshot, we can see that we used an online
website, cyber chief, to decrypt the hex string using base64 encryption. This
worked in our case, and the message is successfully decrypted. We got the below
password —
Password: kiraisevil
As we already know from the hint message, there is a username
named ‘kira’. So, let us try to switch the current user to kira and use the
above password.
Command :- [ cat root.txt ]


Fortifying Digital Defenses: The Essence of Cybersecurity Services
ReplyDeleteCybersecurity services involve measures to protect digital systems and data from unauthorized access and attacks. They include threat detection, vulnerability assessments, security monitoring, and incident response. By implementing these measures, organizations mitigate security risks and maintain trust with stakeholders by safeguarding sensitive information.